Thursday, August 31, 2006

The New Mack Daddy

Here it is - our first Shop Vac. 16 gallon - 6.25 hp, more than we need but we are not complaining.


We sucked up a lot of the old plaster and drywall with ease. Plus, if we get any standing water, I will be ready.

Day 8 - Floor and Electrical Rough-In

Day 8 - still working on the floor, but our electrician also came over to start roughing in the walls.


Addition side - to the studs


The addition did not have any insulation underneath, while the original side had the insulation from underneath in the basement.


The subfloor is almost all in. You can also see that the subfloor is tongue-and-groove plywood, with the idea that it will create a more unified surface.

The electrical stuff is not real thrilling to look at, but it is progress with the walls off.


You can also see the addition side to the studs, after the insulation was removed.

Check out the full day's pictures:
http://s95.photobucket.com/albums/l144/ranchkitchen/Day 8 - Floor Framing and Elec Rough In/

Day 7 - Danze Faucet Part II

I received a shipping notification today for our replacement kitchen faucet.

Hopefully this one will be the right finish.

Day 7 - Floor Framing (Cont)

Day 7 was more of the same with the floor framing and leveling. It is taking longer than the contractor estimated but probably not more than we expected in the back of our heads.

We would rather he take longer and get the damn thing level.

The original side starts to get the new subfloor, while the new side get level.


Here is a closer look to how the addition was built up and why it was not level. The joists were placed on the raised edge without being notched. This made it slope toward the side door.


Closer look to the joists after being fixed


A lot of business that is "pushed" over to the addition side, including: electrical, gas line, HVAC.


Check out the Day 7 picutres here:
http://s95.photobucket.com/albums/l144/ranchkitchen/Day 7 - Floor Framing/

Tuesday, August 29, 2006

Day 5 & 6 - Floor Demo and Framing

Day 5 and 6 was the continued work on the floor.

By Day 5, the old flooring and subfloor was completely removed. And we also got rid of the dumpster in our driveway.

Day 6 started the floor framing, or making the joists level for the new floor. Some joists were shaped and others were replaced.

This is all very interesting, because you can see the pipes, HVAC, and electrical from above the basement. You can also see the orginal foundation wall and how they built the addition.

Old side to the left, new to the right.

You can see the foundation wall and the end of the crawl space.

You can see the water main and the gas line that was poked into the addition side.

Here you can see the old drain line and how it was disconnected from below.

General area and exposed basement.

No Dumpster!!!!!

You can browse the entire photo set here:
http://s95.photobucket.com/albums/l144/ranchkitchen/Day 6 - Floor Demo and Framing/

Sunday, August 27, 2006

8-27 Actual to Date = $20,004

Just updated some items and we are showing $20,004 spent to date on the project.

Latest entries include: contractor deposit, doors, locks, prep materials, backsplash tile.

Day 3 (Sat) - more door purchases

We went to Home Depot to look at some door hardware for our new exterior door. We have Schlage locks throughout the house, so we wanted to make it easy to match the keys.

We, of course, had to special order the locket because nobody sells a deadbolt that is keyed on both sides in satin nickel. Unbelievable. As a result, our lockset was over $100, compared to the $40 that we paid for the gold ones that are off the shelf.

We also bought an interior door assembly for the doorway from the kitchen into the third bedroom. We wanted a 2 panel solid door. We bought a Masonite brand, "fake wood" pre-hung door. Again, they only stock certain styles and ours was not one of them. Another $125 for the door.

I will be updating the spreadsheet soon and giving a report out on cost to date.

Day 2 - Floor demo

Day 2's major activity was to demo the floor to prepare for the floor leveling.

They did not complete the entire floor demo. The vinyl tiles were removed from the original side of the kitchen. Almost half of the subfloor was also removed.

The subfloor was interesting, it was not plywood, it was old-school diagonal boards. Now we can see the insulation that is the only thing separating the upstairs from the basement.

Section of the "old" kitchen with the flooring and subflooring fully removed.

Subfloor with some former water damage.


Doorway threshold into the dining room.

Electrical panel with wood that is discolored that may be evident of some previous water damage. Who knows?


It should be interesting to see what is underneath the addition side, and how they constructed the floor.

http://s95.photobucket.com/albums/l144/ranchkitchen/Day 2 - Floor Demo/

Day 2 - Appliances Moved to the Dining Room

Part of day two was to move the washer, dryer, and fridge to the dining room.


Day 1 - 8/24 - Cabinet and Wall Demo

Day exceeded our expectations.

When we left for work, we left the kitchen as we knew it.

When we came back, we had a dumpster in the driveway, the studs and behind the walls, and some suprises.

Here are some round-the-room pictures of the kitchen demo


Good Lord, why do we have a yellow ceiling?


This window is not really a window that opens. It is a "fake" window on the addition side.

The addition side.


Circuit breaker and behind the fridge.

The plan is to move the electrical panel over two stud cavities and move the dining room vent one cavity to the left.

Dumpster in the driveway

Here is the kitchen sink location that we never knew about.


Here is the full photo album:
http://s95.photobucket.com/albums/l144/ranchkitchen/Day1 - Cabinet and Wall Demo/

Wednesday, August 23, 2006

Prep and packing

Here is a photo set for browsing.

I have not ogranized them but feel free to take a look.

http://s95.photobucket.com/albums/l144/ranchkitchen/Before -Prep and Packing/

Old School Cabinets

Some miscellaneous pictures of our cabinets

Here is the full set:
http://s95.photobucket.com/albums/l144/ranchkitchen/Before - Unpacked and Naked/

Check out the drawer with no rails and just some rollers


This is our corner wall cabinet. Well, it is two runs of cabinetry that come together in a corner. You can stick your arm in one side and out the other, but the back corner is hard to get to and pretty much unusable.


This is a nice one - one huge cabinet for the sink. There are many doors but the inside is one large chamber.

Our new kitchen and dining room

Meet our new kitchen and dining room, which is hanging out in our living room.

We have the essentials: microwave, espresso machine, and microwave.

The dining room table is the counter and pantry - of sorts. We also have bought TV trays as our new dining room table.

As of today - totally clean kitchen

Our contractor came by today and dropped some tools for the demo. Tomorrow, the big demo is supposed to start.

I am fully expecting our driveway to have a dumpster and our walls to be bare!

No mo rats

After the one little guy got caught, we have not seen any more. I set another trap and then the Cook's guy set 3 more in the attic. I checked them and nothing was caught.

I am happy, but also a little unsure because I ave heard that they travel in packs (and 1 ain't a pack).

Bought backsplash tile and exterior door

I am combining these items into one post.

We ordered the backsplash tile. It was approx 40 sq ft (enough for 15% extra) of 3"x6" subway crackled tile. Also included in the order was some coordinated grout and caulk. The total was approx $340.

We ordered a new exterior door assembly. We decided on a fiberglass unpainted woodgrain pre-hung door for $383. We ordered it from Carolina Lumber, and it was $130 cheaper than a similar door at Home Depot.

I think we will re-engage the appliance place to start that ordering process, which will be for our disposal and speed-cooking microwave.

Monday, August 21, 2006

Locking it up

We thought it would be a great idea (my wife gets all the credit) to secure some space in the house with all these people passing through. Our back bedrooms, master and guest, now have deadbolt locks on the doors. The first one that I installed (right) is not as good as the second one (left). I did get one of the door drilling kits in the lock aisle, and it worked beautifully.

I know that the locks are not installed identically on each door. Big deal. Our doors are no peaches before this little project started. After the dust settles on the kitchen, we will look to upgrade our doors throughout the house. The master door is pretty warped, so that is why the deadbolt is so high - I wanted to find a spot where it would not put a lot of stress on the door when locked.

It is not something you see everyday on a bedroom door, but a deterrent and some peace of mind for us.

Our new kitchen cabinets

Just kidding, just all the stuff that used to be in our kitchen cabinets. Now in our third bedroom.

I will have to say that the plastic shelving is pretty good. I wimped out after trying to load the heavy duty metal ones into the cart. They can hold up to 1000 lbs, were easy to install, and the will not gouge up the floor.

Sunday, August 20, 2006

Rats love peanut butter

Well like I said in an earlier post, the guy from Cooks set one trap on Friday. I checked today (Sunday) and found one dead rat. I guess it happens to everyone, but this was my first experience in dealing with a dead rodent. I got my barbeque (former barbeque) tongs and a plastic bag. I also donned rubber gloves, just to be sure.

You can tell what was going through the little guy's head....

Boy, I sure am hungry and I need to find some food. Wait, I think I smell something. It's peanut butter, I think I am getting closer. Here is the peanut butter that someone left. I think I will just nibble a little bit - THWACK!!!!

A rat trap with peanut butter is a cruel mistress. It offers what they want, but it costs the ultimate price. We have one trap that I will set with peanut butter and put in the same place as the first one. I am sure I will have something soon. Arrggghhh.

http://s95.photobucket.com/albums/l144/ranchkitchen/Rats/

Saturday, August 19, 2006

Cleaning out the kitchen

Today we started to clean out the kitchen and laundry room for the work that (should) begin next week. We bought 2 shelving units from HomeDepot for our stuff. Our adjacent bedroom is now full of stuff that used to be in our kitchen and laundry room.

The only thing left is whatever we currently have in our dishwasher. The awesome thing about demoing your kitchen, is that you can write or mess up anything that you want! Our alarm guy came over to disconnect the motion sensor and control panel in our kitchen. I just wrote on the wall a note to poke a hole and pull the wire through. Then, just for fun I started Sharpie-ing miscenllaneous stuff on the wall. One useful thing was that I could mark on the cabinets or drawers that are cleaned out.

I also took some of the doors off the cabinets and realized that I am glad we are outsourcing that portion of the project. I ain't proud. I will post some pics of the pre-demo clean kitchen when we are done.

Rats!

No seriously - I think we have had (or still have) some rats somewhere in our house. Last week, I was making a bagel and coffee for breakfast and heard some scratching sounds in the the wall of the kitchen. Well that was an unpleasant suprise!

Our current pest control folks only did bait, which immediately made our mind go to dead animals in the walls - not good. We then called another pest control company - Cooks- that could set traps. We set up a time for them to come over on Saturday (today).

In the next days, we found a website of a company that specializes in animal control (varmints). Possum, rats, mice, squirells, you name it - they get it. They came out Friday afternoon and tried to talk my wife into sealing our homes cracks and openings for $2000. Well, that seemed high and we confirmed with our contractor that it was. Bonus - any sealing or work he can do for us.

Oh well, it should be interesting to see what if anything is behind our walls and under our cabinets.

Tuesday, August 15, 2006

Exterior kitchen door almost ordered

We went to Home Depot to order a new kitchen exterior door when we did not know the measurement of the jamb. Our associate said that most standard sizes were:4 9/16", 5 1/4", or 6 9/16". Which means ours has to be different - 6.25". I think that probably means it is 6 9/16, but I need to check with our contractor before ordering. Older homes with some previous modifications do not always fit the current inventory of pre-fabricated cookie cutter dimentions.

While we were there, we did get some utility shelves for storing what is currently in our cabinets during the renovation.

Pictures of our granite slabs

Here are some cell phone pictures (i.e., bad quality) of our granite slabs that we picked out. These pictures were taken when we put a hold on the slabs.


I also took pictures of the sides, where the lot and numbers are. These pictures were useful when my wife went to the fabricator to inspect that the slabs were the same ones that we picked.

Monday, August 14, 2006

Demo Prep - Part One

After reading the book Sheetrock and Shellac, I picked up some tips. Some were relevant and some were not.

Our kitchen is in the corner of our house layout. Adjacent to one side is a dining room and the other wall borders a third bedroom that leads into our main hallway. All are hardwood floors that were refinished 4 years ago when we moved in.

The process was to protect them for all the things that could mess them up during our process. Contractors with boots, falling hammers, appliance movement, etc.

Here is the process:
1) Clean the floors
2) Lay down rosin paper (in the roofing isle of Home Depot) and duct tape the paper pieces to cover the entire floor
3) 6 mil plastic (1000 sq ft costs $45!) is the next layer. This is laid down with excess up the baseboards.
4) Masonite or Eucaboard hardboard is the final step. This is essentially a second floor. I taped the pieces together with duct tape to keep the seams from rising up.


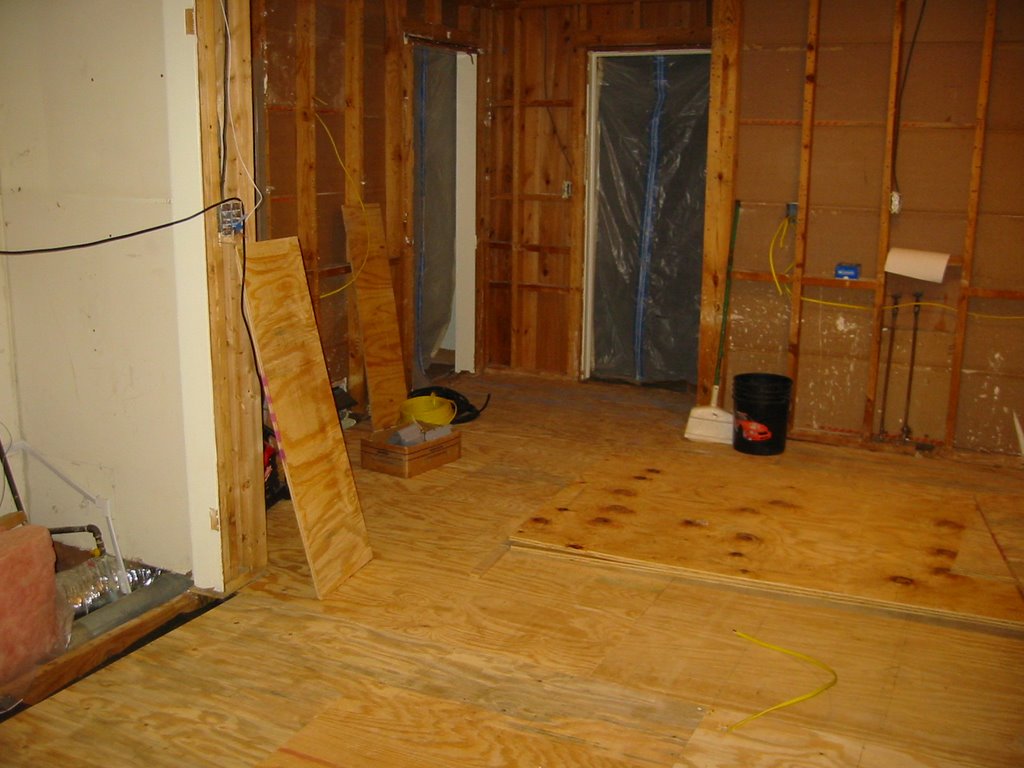
What you are seeing is the dining room looking into the bedroom that are the two non-exterior walls of the kitchen.

Why the ribbons? When the dining room table is in the room, I never hit the crown of my head on the sharp bottom of the chandelier. I hit that thing 3 times yesterday, and when you are walking your eye catches those stupid ribbons and you look up. Hey, it works!

We did this little operation in: the dining room, 3rd bedroom, front foyer, main hallway. All in all, probably around 400 sq ft (give or take). It took an entire afternoon and approx $250 in materials, including a new circular saw.

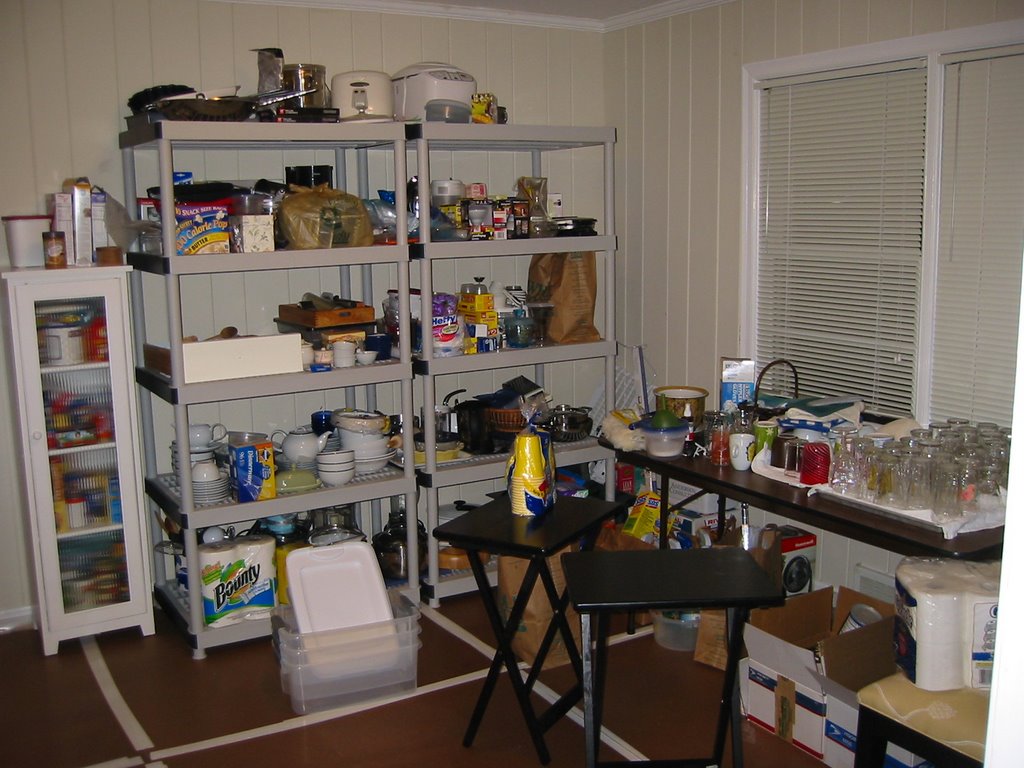
Next step is to unload the kitchen cabinets and put up plastic curtains in all our doorways.

Procurement Update - Some good and bad

The good:
Our Home Depot Expo tile order came in after approx 1.5 - 2 weeks. We will be holding that at the HD warehouse for up to 30 days.

The bad:
After further inspection our Danze faucet looks to be a defective order. The neck and base is a brushed stainless steel, but the "business end" is a little too polished. We called our friends at HomeClick for a return authorization. They were very good about it. We are re-ordering a new one and will submit ours for a return rather than exchange. You better check your stuff from them because you have 3 days from receipt to examine.

Wednesday, August 09, 2006

Faucet = In

I am pleasantly suprised that the online faucet order is in ahead of schedule and with all its parts and documentation.

I am giving HomeClick big props on the entire process. Your results may vary, depending on what you order.

Tuesday, August 08, 2006

Kitchen faucet has shipped

I got a suprise yesterday in my Inbox - shipping confirmation from HomeClick that our Danze kitchen faucet has shipped. This is 2 weeks ahead of expected ship date from the initial order. I know from friends that you have to inspect and avoid multiple packages in your shipping to make the order "real", but I am hopeful.

FedEx tracking reported that the expected delivery date is Aug 9. I will report back.

Saturday, August 05, 2006

Contractor contract signed and paid 10%

Well, we are in this for real. I think we have paid a portion for each component of our project, except for decorative and electrical.

We inked our contract and scope with our contractor Friday night. The scope of work came to $10,575 which is a fixed price for the confirmed scope. We paid him 10% down.

We are scheduled to start demo Aug 21.

Wednesday, August 02, 2006

Contractor Scope - Final

Current estimated cost is $41,614. Updated summary spreadsheet is included in the online spreadshseet (see right side links).

We clarified language for details in the scope document with the contractor last evening.

Minor changes for the following
- $200 to relocate dining room HVAC vent to accomodate circuit panel move
- $75 to pickup and stock tile from HD Expo distribution center
- $125 labor to install new door from kitchen to 3rd bedroom
- $150 materials for new door purchase (preceding item)

Backsplash tilers TBD

After talking with a friend regarding our doing the backsplash ourselves, he said why if you have someone good and cheap to tile your kitchen floor.

Good point. That very well may happen.